Using web interface
This tutorial will show how to do basic operations in dojot, such as creating devices, checking its attributes and creating flows.
Note
- Who is this for: entry-level users
- Level: basic
- Reading time: 15m
Device management
This section will show how to manage device. For this tutorial we will show how to add two thermometers and a virtual device that will represent an alarm system that will monitor both sensors.
As described in Concepts, all devices are based on a template. To create one, you should access the template tab at the left and then create one new template, as shown below.
Now we have one template from which devices can be “instantiated”. All devices based on it will accept messages via MQTT that are sent to “/devices/thermometers” topic. To create new devices, you should go back to the devices tab and create a new device, selecting the templates it will be based on, as shown below.
Note that, when you select the template in the right panel at device creation screen, all attributes are inherited from that device. You could add more templates as needed, keeping in mind that templates used to compose a device must not share an attribute with the same name.
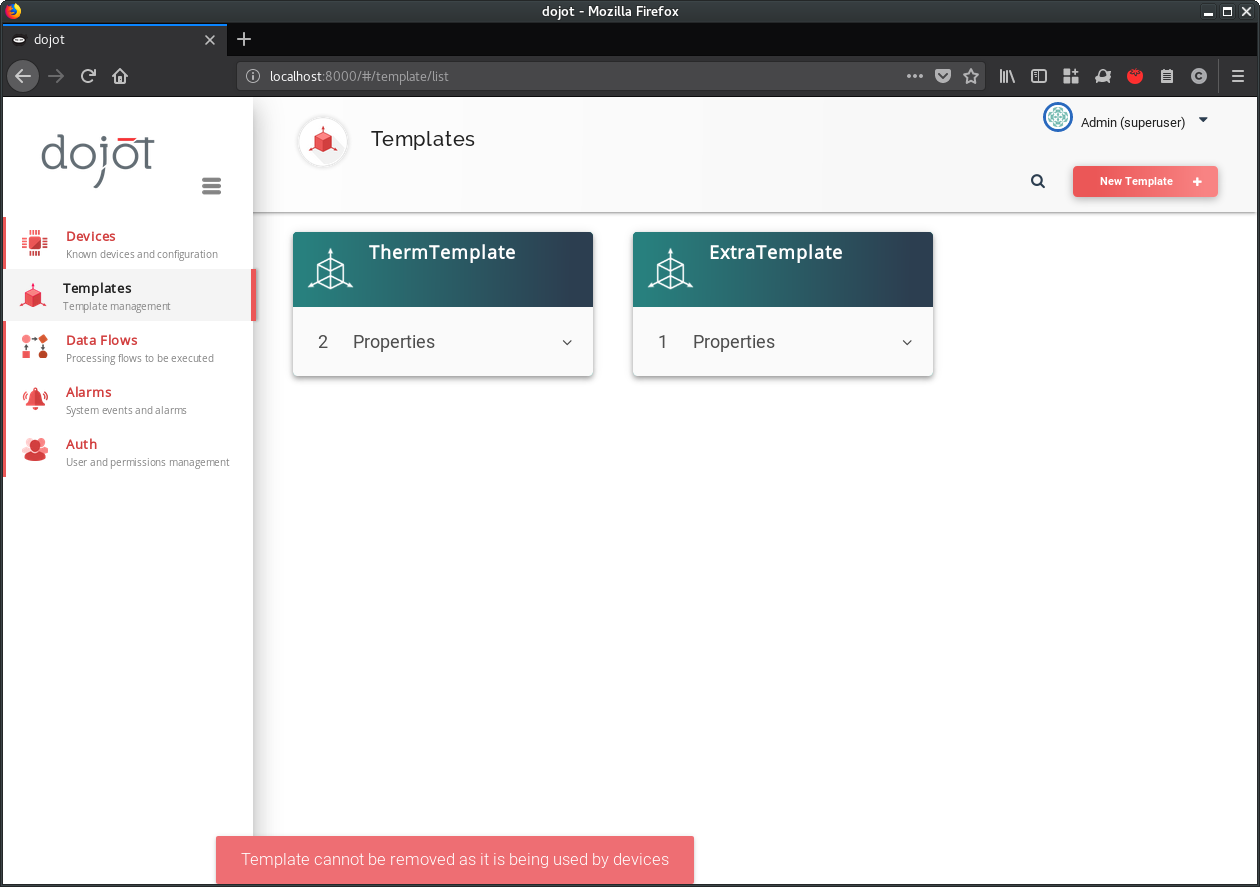
Attention
As devices are tightly associated to templates, if you want to remove a template, you should remove all its associated devices first. If such thing happens the following error message will appear:
Attention
You can add and remove attributes from templates and they will be immediately available to devices. In case of new attributes being added, though, you should keep in mind that there must not be any device with templates which have attributes with same name. If such thing happens, the following message will appear:
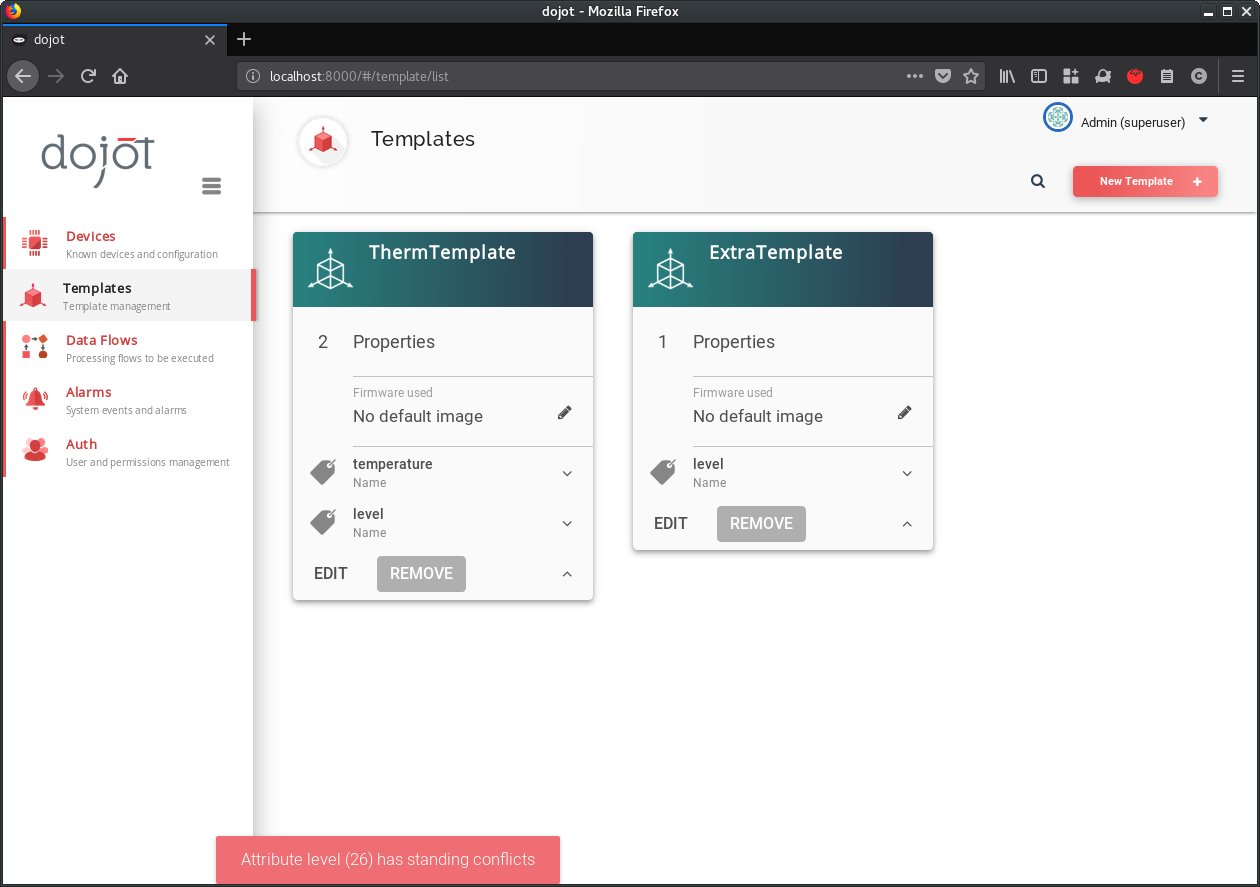
This snapshot was generated by creating a new template (ExtraTemplate)
with one attribute, called level. Then a new device based on both
templates was created and, afterwards a new attribute also called level
was added to ThermTemplate.
When this happens, no modification is applied to the template (no attribute named “level” related to the “ThermTemplate” is created). However, it remains in the template card so the user can figure out what is happening. If the user refreshes the page, it will be reverted to what it was before the modification.
Now the physical devices can send messages to dojot. There are few things to
pay attention to: as we defined the MQTT topic (all devices will send to
/devices/thermometer topic), the devices must identify themselves using the
client-id parameter from MQTT protocol. Another way of doing that is to
just use the default topic scheme (which is /{SERVICE}/{DEVICE_ID}/attrs.
Just for the sake of simplicity, we’ll emulate one device using mosquitto_pub
tool. We set the client-id parameter by using the -i flag of
mosquitto_pub.
Now that we’ve created the sensors, let’s create a virtual one. This will be the representation of a alarm system that will be triggered whenever something bad is detected to these sensors. Let’s say they are installed in a kitchen. So it is expected that their temperature readings will be no more than 40C. If it is more than that, our simple detection system will conclude that the kitchen is on fire. This alarm representation will have two attributes: one for a severity level for a particular alarm and another one for a textual message, so that the user is properly informed of what’s happening.
Just as for “regular devices”, virtual devices also are based on templates. So, let’s create one, as shown below.
Flow configuration
Once we’ve created the virtual device, we can add a flow to implement the logic behind the alarm generation. The idea is: if the temperature reading is less than 40, then the alarm system will be updated with a notification of severity 4 (mildly important) and a message indicating that the kitchen is OK. Otherwise, if the temperature is higher than 40, then a notification is sent with severity 1 (highest severity) and a message indicating that the kitchen is on fire. This is done as shown belown.
Note that the “change” nodes have a reference to an “output” entity. This can
be thought as a simple data structure - it will have a message and a
severity attributes that match those from the virtual device. This “object”
is referenced in the output node as a data source for the device to be updated
(in this case, the virtual device we’ve created). In other words, you can think
of this as a piece of information carried from “change” nodes to the “virtual
device” with names “msg.output.message” and “msg.output.severity”, where
“message” and “severity” are the virtual device attributes.
So, let’s send a few more messages and see what will happen to that virtual device.
If you are interested on how to use the data generated by these devices in your application, check the Building an application tutorial.